The ULTIMATE Guide to Using Biblehub.com

Have you ever heard of Biblehub.com? I mentioned it in last week’s post on my favorite Bible study tools, but this week I wanted to expand on all the awesomeness this website has to offer! If you’ve ever wondered how to do an in-depth word study, topical study, or read Biblical commentaries when you don’t have a huge library at your disposal – this post is for you!
They explain their mission clearly on the Bible hub website:
Our mission is best summarized as follows:
1) Increase the visibility and accessibility of the Scriptures online.
2) Provide free access to Bible study tools in many languages.
3) Promote the Gospel of Christ through the learning, study and application of God’s word.
Now that sounds like a worthwhile mission to me!
So, grab your Bible, your notebook, and some pens and pencils. Then, open up a browser window and head on over to biblehub.com and let’s get started!
1. Navigate to a passage
Lets start out with something simple – finding a passage!

To find a passage, you can use the drop down menus at the top of the page, but the easiest thing to do is just type what you are looking for into the search box in the top middle of the screen. Hit enter/return and you’ll be brought to…

… your passage!

Now, you can use the blue arrows on the side of the passage name or the circles on the outermost sides of the page to navigate to the previous and next chapters.
2. Search for key words
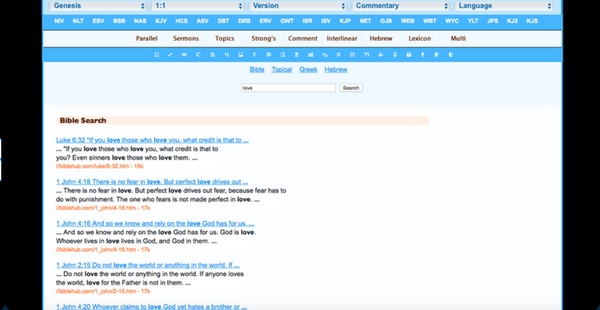
You can also use the search bar to search for key words, names, places, etc.
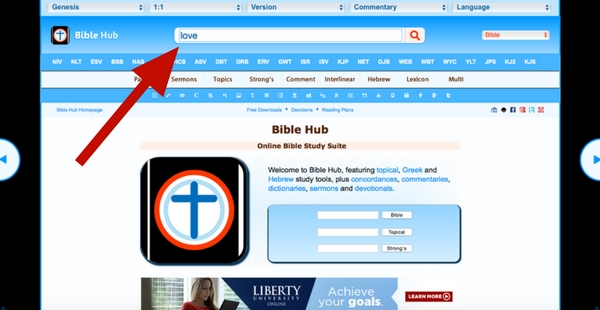
Just type in the word(s) you want to search for and it will pop up with a list of verses!
3. Find parallel verses and cross references
There are a few ways to find the page with this information…
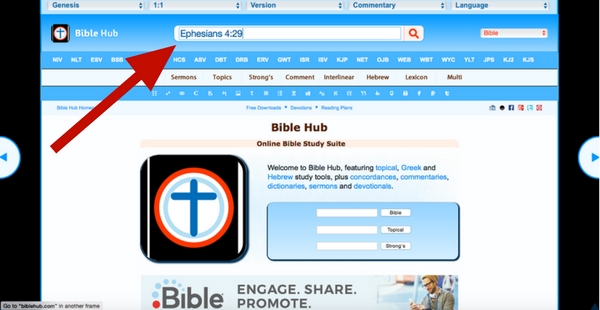
The first way is to type in the exact verse that you want to look up, both chapter and verse. If you just put the chapter number this will not work, it will take you to the page that shows you the full chapter.
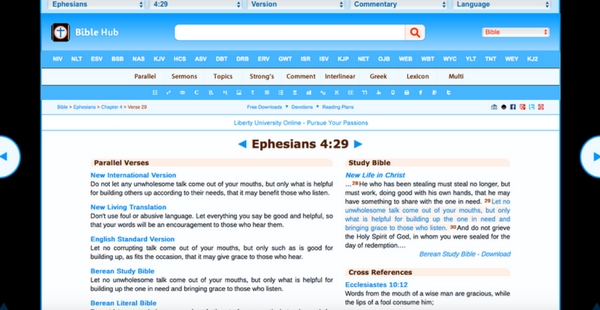
That will bring you right to this page! Again, you can use the blue arrows to navigate forward and backward through the passage. However, before we get into all the goodies located here, lets look at a few more ways to find it.
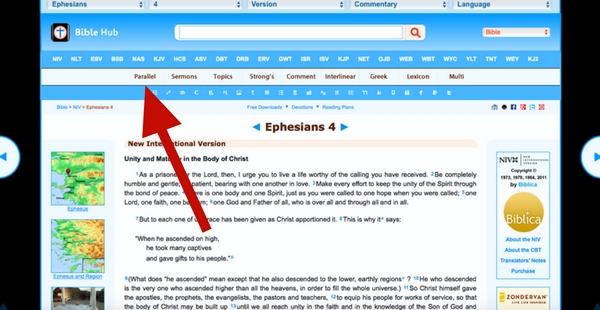
For the second way, maybe you want to view the parallel versions of the whole chapter. This time, type the chapter you are looking for in the search bar and it will bring you to this familiar page. Next, click on the word “parallel” in the second (white) menu bar.
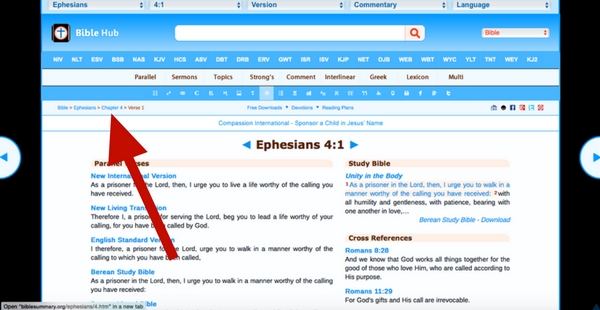
It will assume that you want to see verse one, so to get back to the whole chapter, click the chapter link in the breadcrumb trail in the upper left corner.
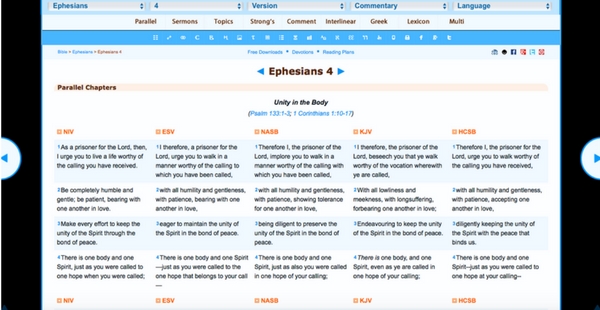
Voila! You can now read the whole chapter in different versions side by side.
Okay, lets look at one more way…
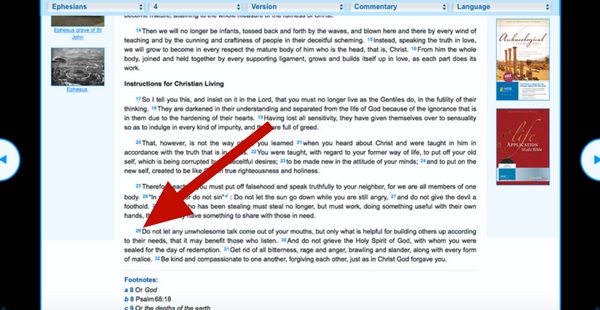
For this third way, perhaps you have a general idea of where the verse is, but you don’t know the exact reference. First, search for the book and chapter in the search bar. Use the blue arrows to navigate around if you didn’t get to the chapter you were thinking of. Then, scan through the chapter until you find the verse you were looking for. To see the parallel verses, click on the blue number at the beginning of the verse.

Yay! We are back here once again! Lets have a look around…
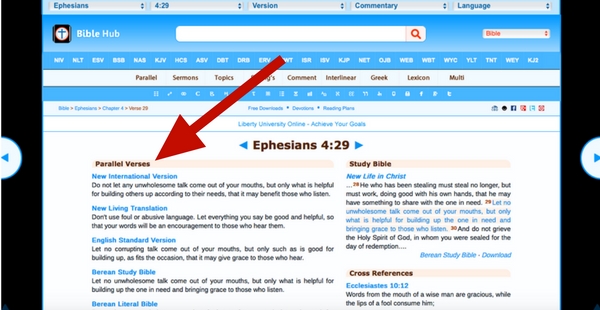
Over to the left we have a nice long list of parallel verses.
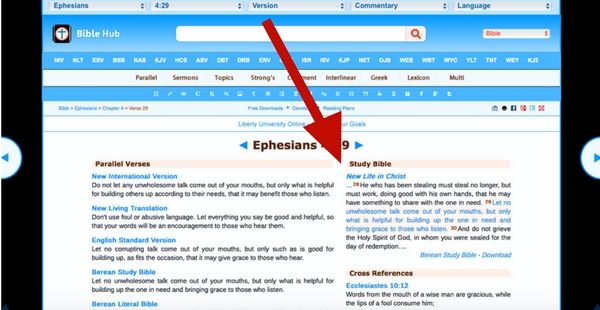
To the right you’ll find the verse in context. If you start scrolling down right below it you will see a list of cross references.
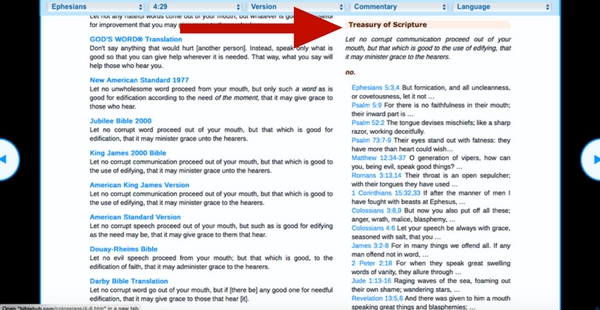
If you continue to scroll down, underneath the cross references you will find the “Treasury of Scripture” which will break the verse down and find more related verses. These two sections are so handy to have when studying the Bible!
4. Do a word study
If you’ve always heard about the awesome practice of doing a word study but was never quite sure how to go about it – this section is for you! Biblehub.com makes it super easy to do an in depth word study.

First, use the search bar to navigate to the verse that has the word you’d like to study.
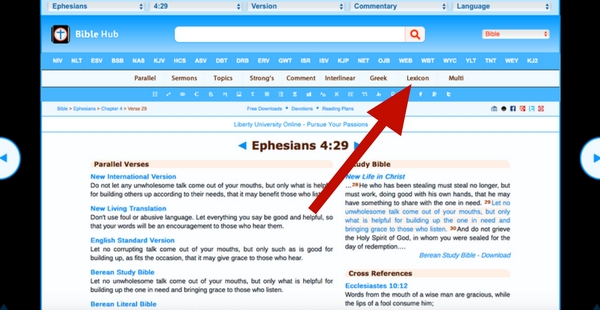
Like previously, there are multiple ways you can go about this, but this way is my favorite. Once, you’ve got your verse, click on the word “lexicon” in the white menu bar.
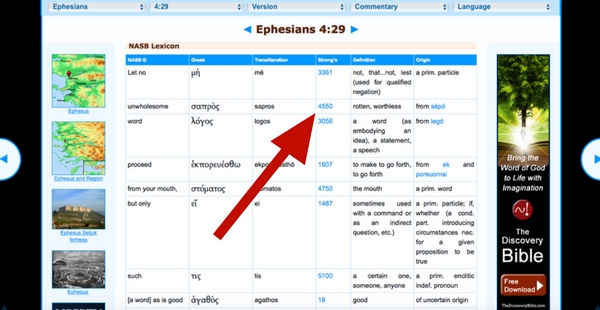
Clicking that will pop you over to this handy little chart. It has the verse broken down along with the Greek (or Hebrew), the transliteration (aka the way we would spell the Greek word with our alphabet), link to Strong’s, and a brief definition and origin. If you scroll down you will find a little more info at the bottom as well.
Next, you are going to want to find your chosen word in the verse and click on the blue Strong’s number in the fourth column.
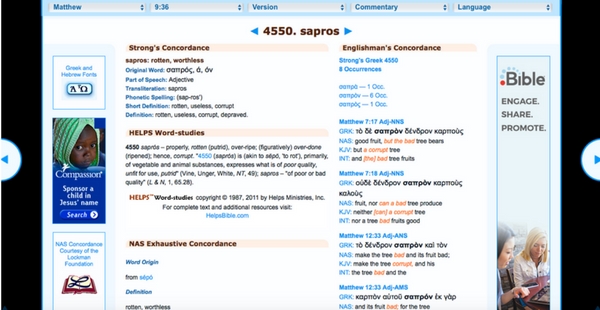
That will bring you to this lovely page! There is a lot of information here that you can explore, but I’ll highlight a couple of my favorite things.
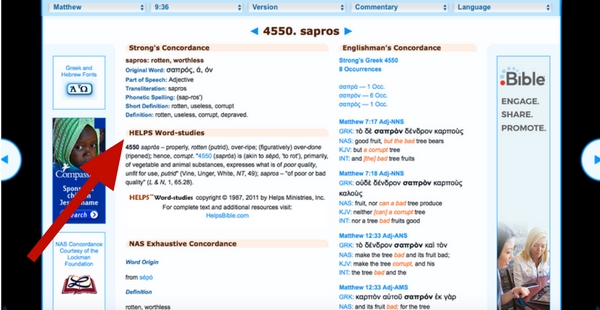
Over on the left side of the page you will find word definitions from different sources. My favorite is the HELPS Word-studies. It gives an in-depth explanation of the word in a way that is usually pretty simple to understand.
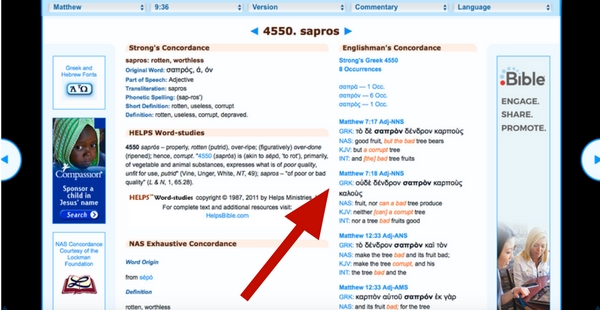
Over on the right side of the page is a concordance listing. Here, you can find other verses that use the same word in the original language. This can be of great help to further understand the meaning that the author was intending when he used that word.
5. Use a concordance to do a topical study
Studying the Bible chapter by chapter, verse by verse is often the best way to really dig into the text. However, it can also be fruitful to do a topical study. When you take a topic like “love” or “justice” and follow it through the whole Bible your understanding can greatly increase.
There are a couple ways you can begin your topical study. One easy way is to enter the topic you are studying in the search bar, like we did in tutorial #3, bringing up a list of verses with that word in them. However, if you are looking for more information, try scrolling down to the “bible study tools” section.
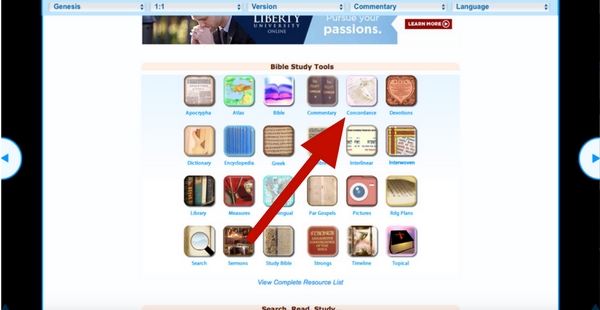
Once you are there, click on “concordance.” (“Topical” will get you the same place)
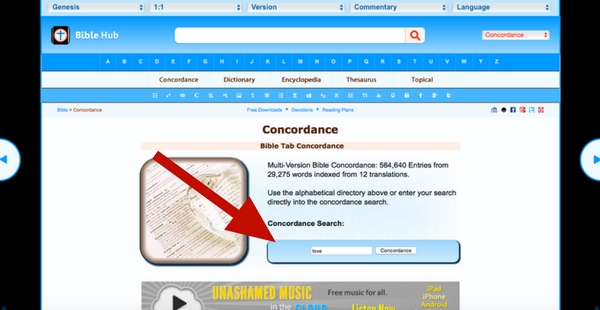
Then, enter your topic in the “concordance search” box.
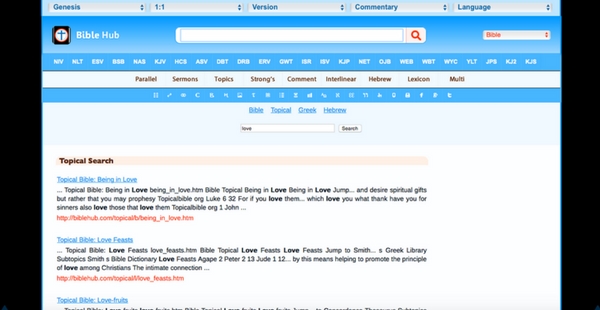
That will bring you to the “topical search” page where it will break your topic down into sub-categories. Scroll through and click what you would like.
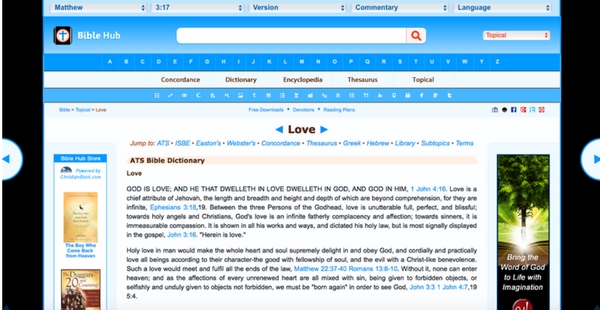
That will bring you to this page which is full of info! You’ll find entries from dictionaries and encyclopedias, information on the original languages, books from their library, thesaurus and concordance entries, and a lit of subtopics and related topics. Whew! All that info right at your fingertips!
6. Access commentaries
Alright, now let’s look at some ways to access the many commentaries you can find on bible hub!
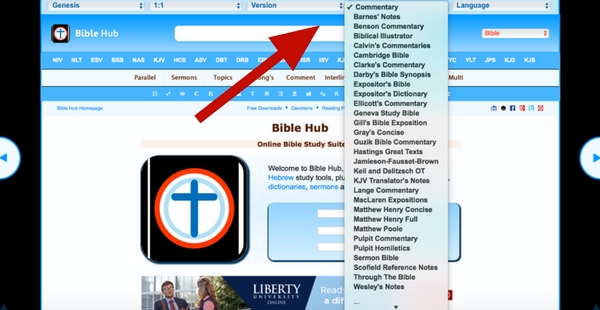
First, there is a drop down menu on the top of the page that lists the commentaries and some different topics you can explore.
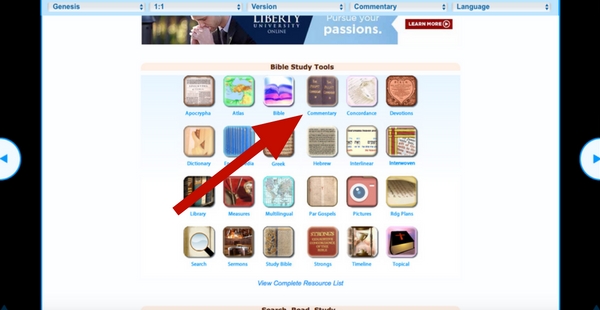
For a more complete list of their commentary options, scroll down to the “bible study tools” section and click on “commentary.”
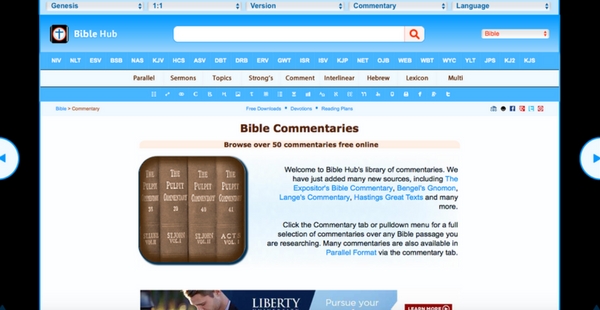
That will bring you to this awesome “Bible Commentaries” page. If you scroll down you will find over 50 commentaries broken down into various categories and by book of the Bible.
Okay – let’s look at one more way to get to the commentaries. This time for if you are looking for commentary on a specific passage.
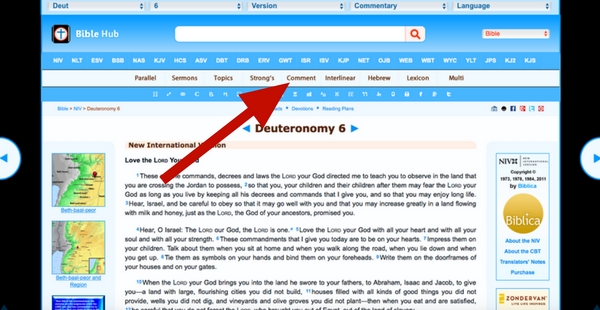
Enter the passage you are looking for into the search bar on the main page. Then, click on the “comment” button in the white menu bar.
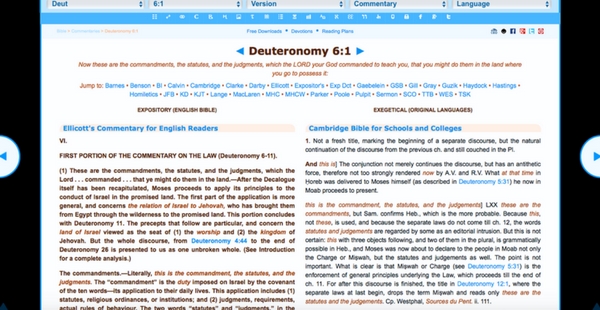
That will bring up a list of all the commentaries they have starting with the first verse in that passage. Use the blue arrows on the left and right of the page to navigate forward and backward in the passage.
7. Chapter Outline
Sometimes it can be really helpful to have an overview of the chapter you are studying. Here is a quick way to find one!
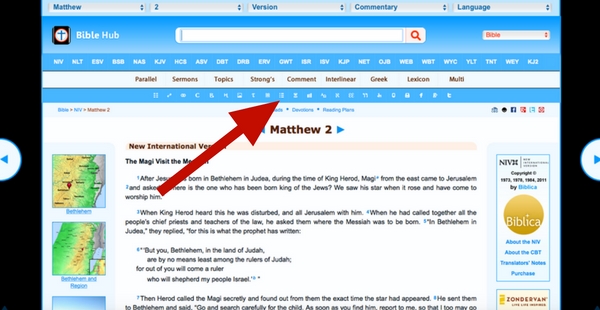
Using the search bar, search for the passage you want to outline. Then, on the bottom blue menu bar, find the little bitty outline icon (it looks like three rows of a dot followed by a line) and give it a click.
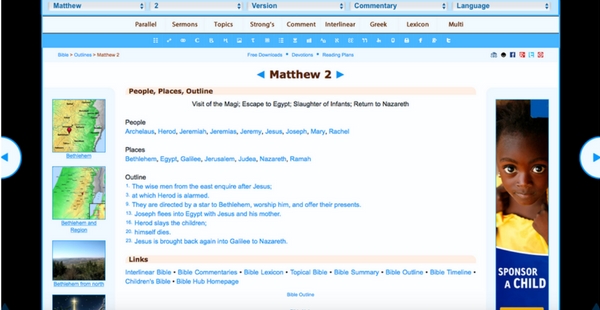
Then, you’ll get a page with lists of the people and places and an outline of the passage. Everything is conveniently a clickable link, so you can easily find more information on the different topics.
8. Atlases
Using atlases to actually be able to see where the people and stories you are reading about are taking place can be very helpful. Let’s look at two ways to find some!
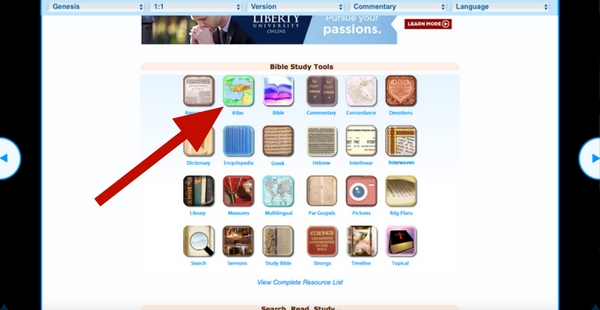
On the main page, scroll down to the “bible study tools” section and click “atlas.”
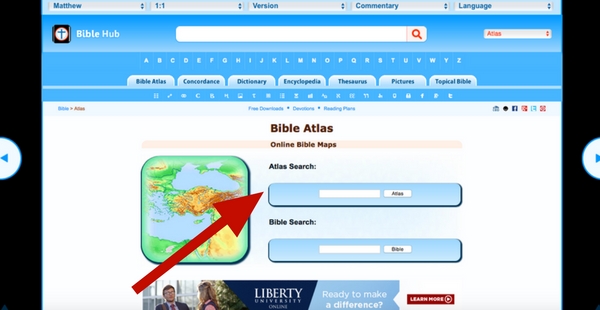
Type a name, location, or key word in the “atlas search” box. (I searched for “Moses”)
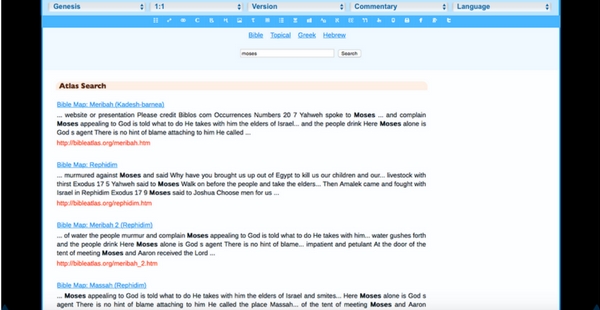
Scroll through the results that pop up to find what you are needing…
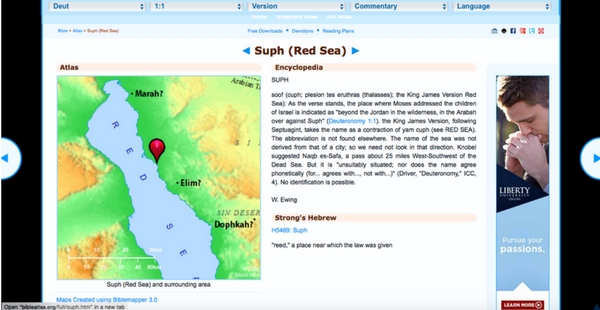
…and you’ll get a page with a nice map, plus a bunch of other helpful info!
Here’s one other quick way to get to an atlas…
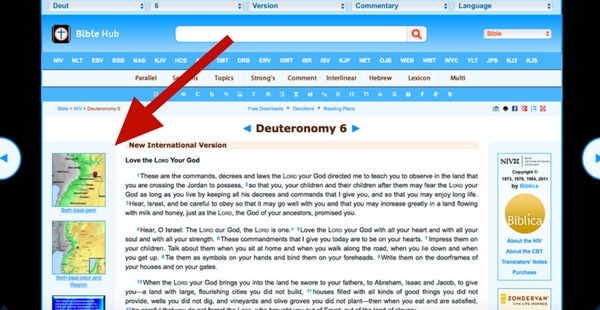
For this, just enter your passage into the search bar and right to the left you will see a couple related maps pop up! Click on any of them to bring up the page with all the additional information.
9. Parallel Gospels
If you’ve never used a parallel gospel, it is pretty neat! It takes the accounts in the gospels, arranges them in chronological order, and lines them up so you can see the same stories side by side. It’s especially helpful when you are studying a passage in one of the gospels and you want to see the same account from the other gospel writers.
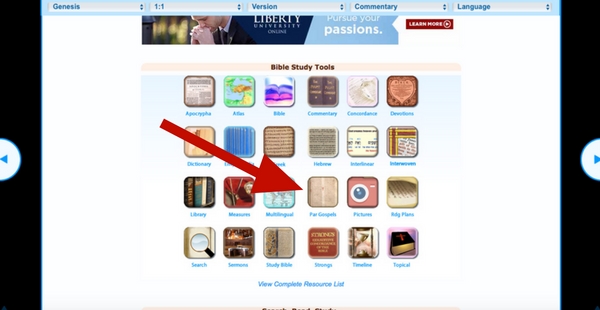
Just scroll down on the main page to the “Bible Study Tools” section and click on “Par Gospels.”
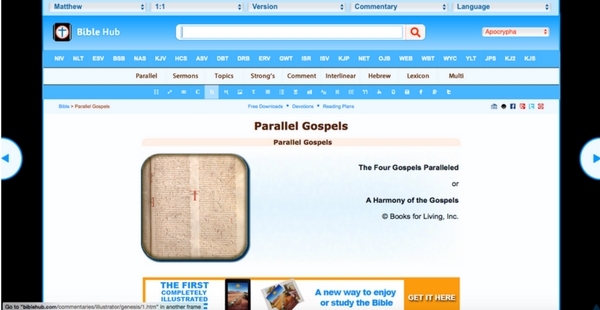
That will bring you to this page. If you scroll down…
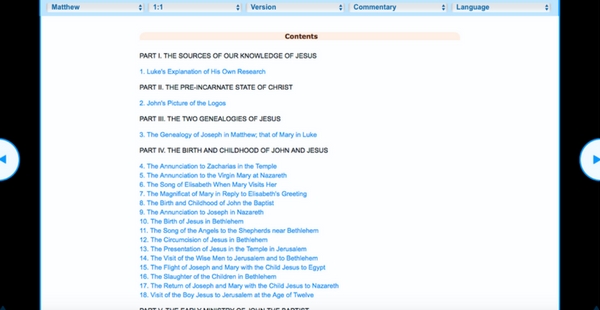
…you will find the chronological list of the contents of the gospels. Click on the topic you are looking for…
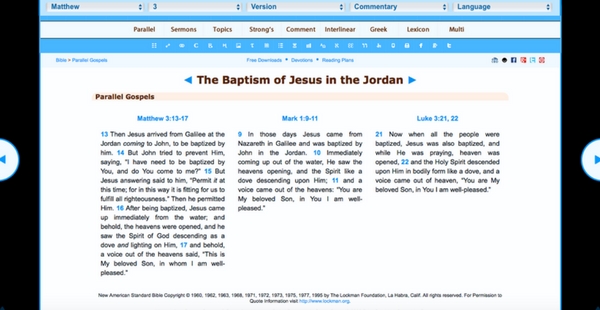
…and it will bring up a page with the passages in any of the gospels they are found in!
10. Bible history timeline, Library of Christian works, Weights and Measures and More!
There is lots more to explore on Bible hub, but here’s a last few quick things!
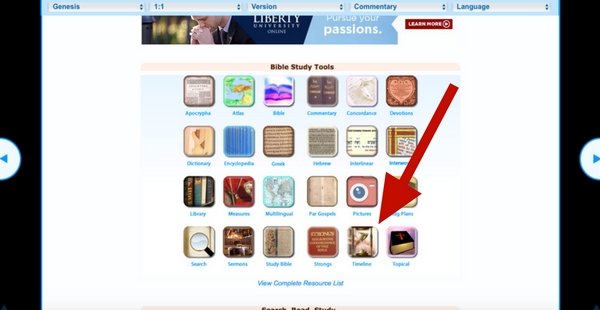
This timeline comes in handy! Especially when you are trying to sort out the order of events in the Old Testament. If you click on “timeline” under “Bible Study Tools” it will take you to a complete timeline of the Bible.
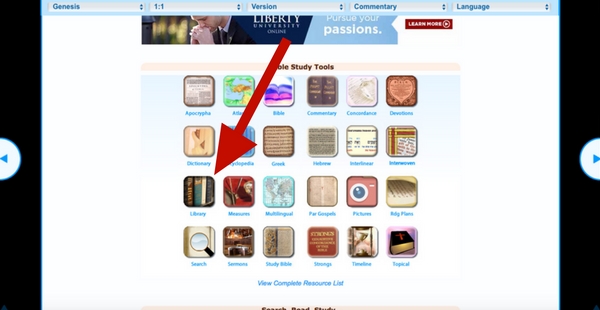
A huge resource they have is their library of Christian works! From the early church fathers, to Bible studies, to church history, and much more! Just click on “library” in the “Bible Study Tools” section to see the whole collection.
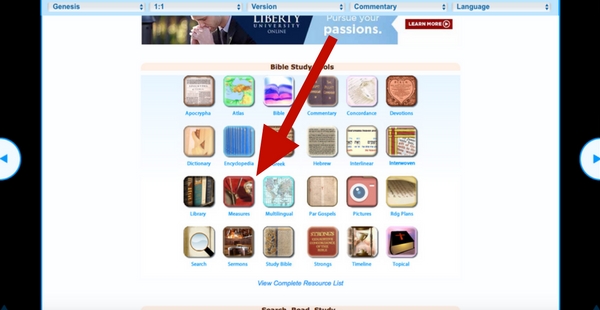
I thought this was a neat feature – a list of weights, measures, etc. It’s a handy list for any unfamiliar unit of measure that you may run across in your studying.
Well, that’s all I have! There is definitely more you can discover on Bible hub, but hopefully that will get you started! Do you want to see more Bible study tutorials? Just let me know what you need in the comments below!
Affiliate links included. Thank you for using your purchases to help support Steadfast Family.


This is great! Thank you so much! I used Biblehub a bit, but I didn’t know it has all this info available. Good to know 🙂
I’m so glad it could be helpful to you! 🙂
Thank you, Liz, for this awesome “manual” for Biblehub! May I suggest another helpful tool to study and to memorize Scripture? It is the app Bible Memory: Remember Me. Quizzes, flashcards, audio recording, playback and an intelligent review system help you to memorize your favourite verses from 44 Bible versions. It’s so easy to use it is even part of Google Play for Families.
What has happened to Biblehub.com? I have used it extensively in the past but within the last few months my use of it has been greatly restrained by all of the obtrusive advertising and I might add much of it is inappropriate for any website let alone Biblehub.com. If they need money for support then they should allow donations.
Huh, interesting! I still regularly use it and haven’t noticed this. Just a few Christian-based ads.
Hi Liz!
Can we select which parallel versions when reading a chapter? Thanks.
Unfortunately I am not sure! I haven’t tried to do that.
Why doesn’t BibleHub.com have all the links anymore? (i.e. commentary, Hebrew/Greek dictionaries) I’m devastated. It had helped me so much in understanding the Bible.
Hi Brenda! I’m still seeing the same resources when I visit the bible hub website. Could you be more specific of where you are missing things? I don’t know that I can help, but I’m willing to try! 🙂
How do I bookmark so when I open it opens to where I left.
Unfortunately, I’m not sure if that is possible.
On the Comment (Commentary page), which version of the Bible is used? e.g. ◄ Acts 11:13 ►
And he showed us how he had seen an angel in his house, which stood and said to him, Send men to Joppa, and call for Simon, whose surname is Peter;
What version of the Bible is displayed in the commentary? e.g. at https://biblehub.com/commentaries/acts/11-13.htm
◄ Acts 11:13 ►
And he showed us how he had seen an angel in his house, which stood and said to him, Send men to Joppa, and call for Simon, whose surname is Peter;
I am sorry, I do not know the answer to that!
Is there a way to select the desired versions for the parallel Bible?
I cannot find a way to do it, and it doesn’t seem to be intuitive.
First of all, I wanted to say thanks to Liz for “The Ultimate Guide”! This is so helpful. Even though I’ve used Bible Hub for about 15 years, I learned several things from your good explanations and clear screenshots. Thank you!
Barry, if you’re willing to only view two parallel versions at the same time, I’ve found a way to choose which two versions they are. I don’t know of any way to choose your versions when there are more than two viewed in parallel.
To choose which two versions to view, try these steps.
1) Enter the book and chapter you want to study in the search bar where “Enter Reference or Keyword” appear in light lettering.
2) Using the three-letter acronyms (TLAs, to add one more!) directly under the search bar, choose the version you would like to have displayed on the left side of your screen. (Hovering over a TLA with your cursor will show the full name of the version.)
3) When that version appears, notice the large lettering showing the book and chapter you’re now viewing. Just under that is a gray bar. On the left side of the gray bar is the name of the version you’re using. On the right side of the bar is the abbreviation “Par” (for “Parallel”) and a small down arrow. Click on that arrow.
4) You should now have a parallel view of two versions. To select the version you would like to have displayed on the right side of your screen, select it from the list of blue-lettered TLAs in brackets that appears in the new gray bar right under the book and chapter you’re viewing. (The TLAs no longer have the feature of showing the full name of the version when you hover your cursor on them, but you can still find the same TLAs near the top of the page and hover on them to find out the full name.)
Reply if this doesn’t work for you, and I’ll see if I can figure out what went wrong.
Keep loving His Word!!
Thanks for all the tips Tony!!
Liz, thank you for your help with BibleHub.
I want to do a word study and scan all verses containing an English word, say in NAS. BibleHub reports “408 verses found. Showing up to 25”. By Clicking “More” it will increase the list to 100. How do I get Bible Hub to list ALL 408 verses? I’m sure there is a simple answer, but I can’t seem to find the way.
Thank you for any help you can give.
Blessings,
Charley
Charley,
I’m afraid I can’t find the answer to that myself! Very strange, as it seems like there should be a simple way. It looks like they have a contact email on their website (scroll to the bottom of the page to find it), perhaps you can email them and ask! If you get an answer I’d love to have you share it here!:)